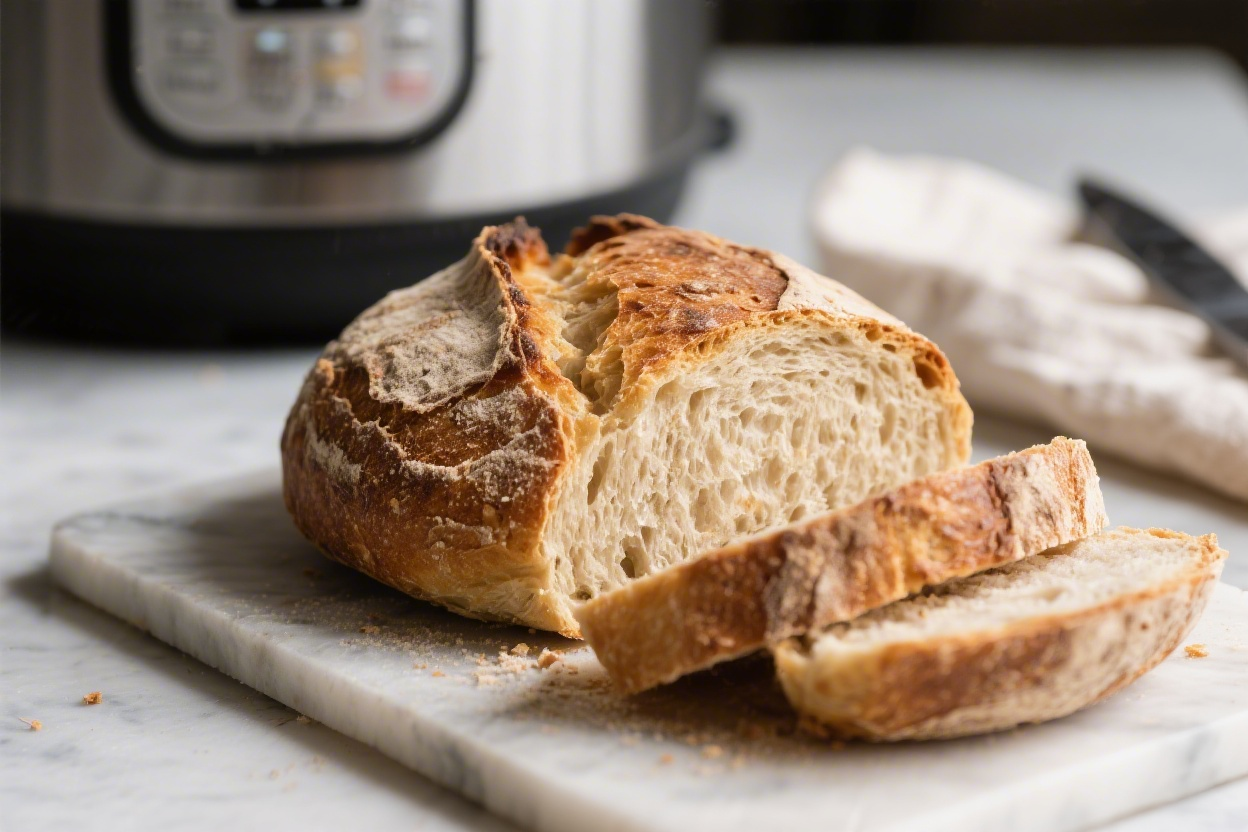
No‑Knead Pressure Cooker Rustic Loaf – Ready In Under an Hour
If warm, crusty bread in under an hour sounds impossible, this recipe will change your mind. With a pressure cooker and a quick broil at the end, you’ll get a loaf that’s tender inside and golden on top—no kneading required. The method is simple, forgiving, and perfect for weeknights or last-minute guests.
You’ll mix, rise, pressure cook, then finish in the oven for that classic rustic look. It’s homemade bread without the long wait or fuss.
What Makes This Recipe So Good
- Speed without shortcuts: From start to finish, it’s ready in about 55 minutes, including a speedy rise.
- No special skills needed: No kneading or fancy shaping—just stir, rest, and cook.
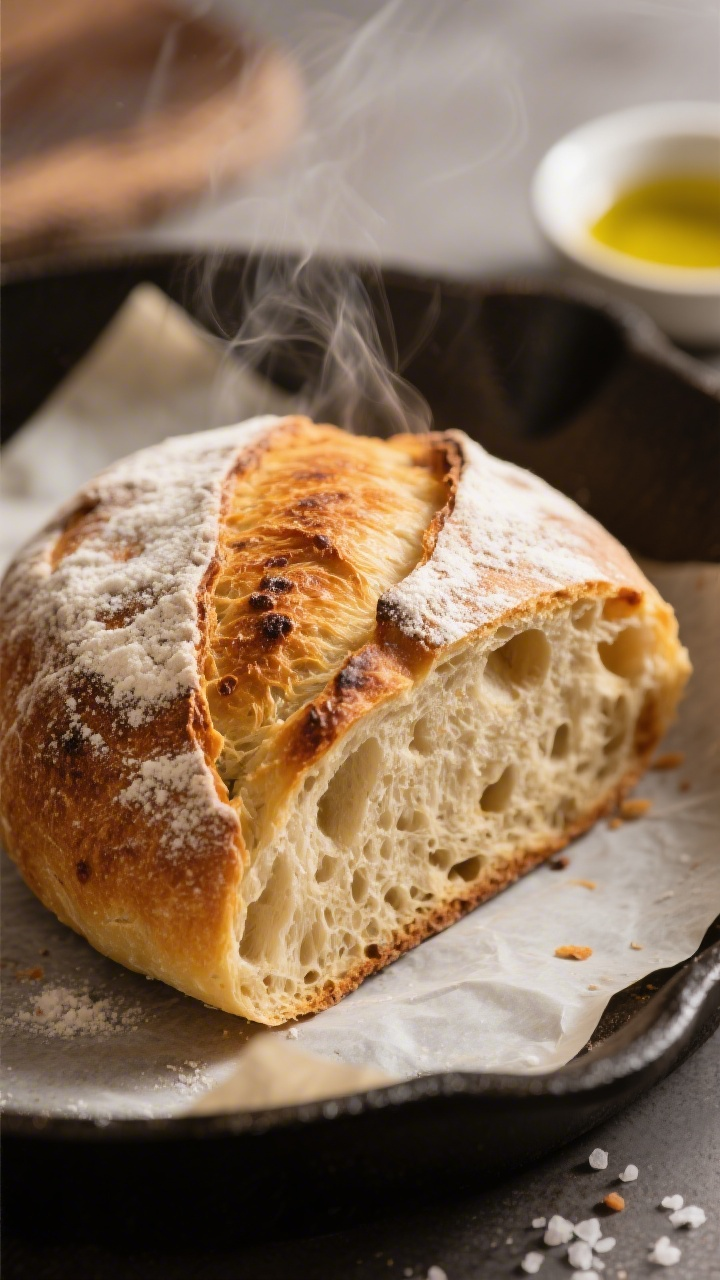
- Soft crumb, crisp top: Pressure cooking keeps the interior moist and tender; a quick broil creates a crackly crust.
- Everyday ingredients: Flour, yeast, water, and salt—plus a splash of oil for easier handling.
- Reliable results: The pressure cooker creates a steamy environment that helps the dough spring beautifully.
Ingredients List
- All-purpose flour (2 1/2 cups; bread flour also works)
- Warm water (1 cup, about 105–115°F)
- Instant or rapid-rise yeast (1 packet or 2 1/4 teaspoons)
- Kosher salt (1 1/4 teaspoons)
- Olive oil (1 tablespoon, plus extra for greasing)
- Cornmeal or parchment (optional, for easier transfer)
Step-by-Step Instructions
- Prep your setup: Place a trivet in your pressure cooker and add 1 cup of water to the pot. You’ll cook the dough on a small, heatproof dish or pan that fits inside.
Grease that dish lightly with oil and set aside.
- Mix the dough: In a large bowl, combine flour, yeast, and salt. Stir in warm water and olive oil until you get a shaggy, sticky dough. It should hold together but feel tacky.
- Quick rise: Cover the bowl with a plate or plastic wrap.
Let the dough rest in a warm spot for 20–25 minutes, until slightly puffy. It won’t double, but it should loosen and rise a bit.
- Shape gently: Oil your hands and scoop the dough onto a lightly oiled surface. Fold the edges toward the center a few times to form a round.
Don’t press hard—keep the air in.
- Transfer to the dish: Place the dough seam-side down in the greased, heatproof dish. If you like, dust the top lightly with flour for a rustic look and make one shallow slash with a sharp knife or scissors.
- Pressure cook: Set the dish on the trivet inside the cooker. Seal the lid and cook on High Pressure for 20 minutes.
When done, allow a 5-minute natural release, then quick release any remaining pressure.
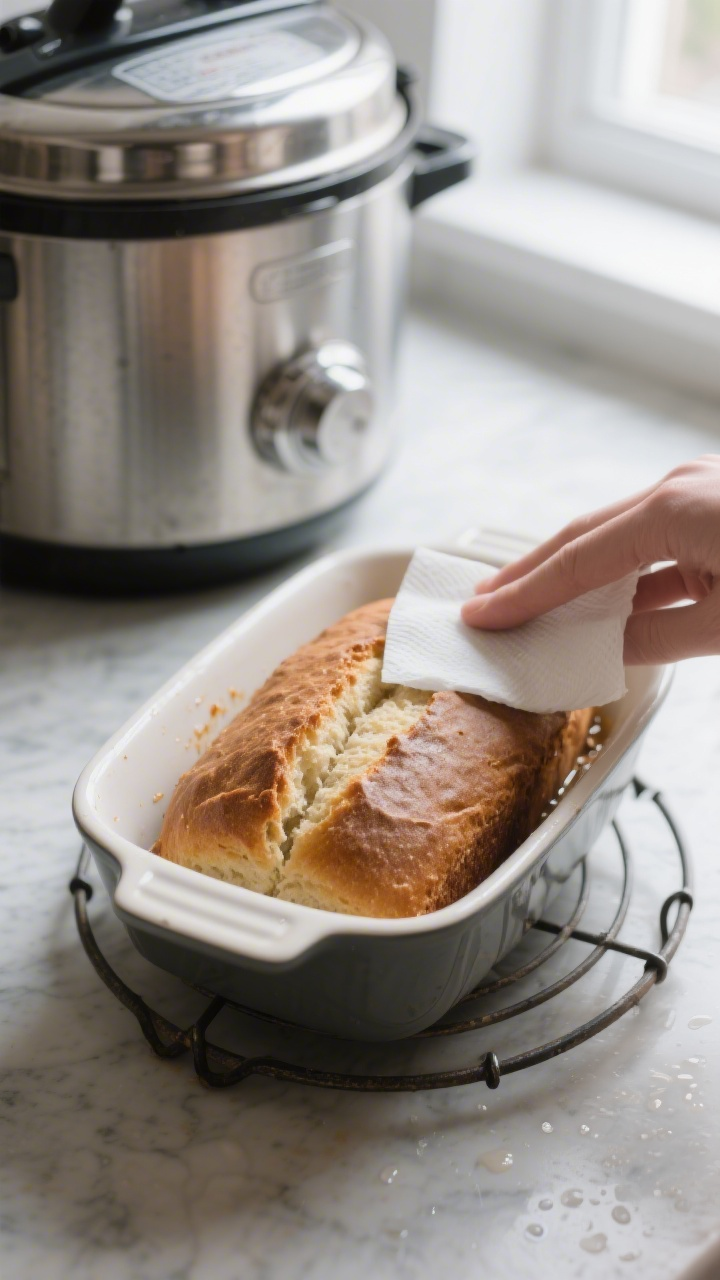
- Dry and preheat for crust: Carefully lift out the dish. Preheat your oven’s broiler on high and position a rack in the upper third. If the loaf surface looks damp, blot gently with a paper towel.
- Broil to brown: Transfer the loaf to a parchment-lined sheet or a preheated cast-iron skillet.
Broil 3–7 minutes, watching closely, until the top is deeply golden with a few darker spots. Rotate the pan as needed for even color.
- Cool briefly: Move the loaf to a rack. Let it rest 10–15 minutes before slicing so the crumb sets and stays moist.
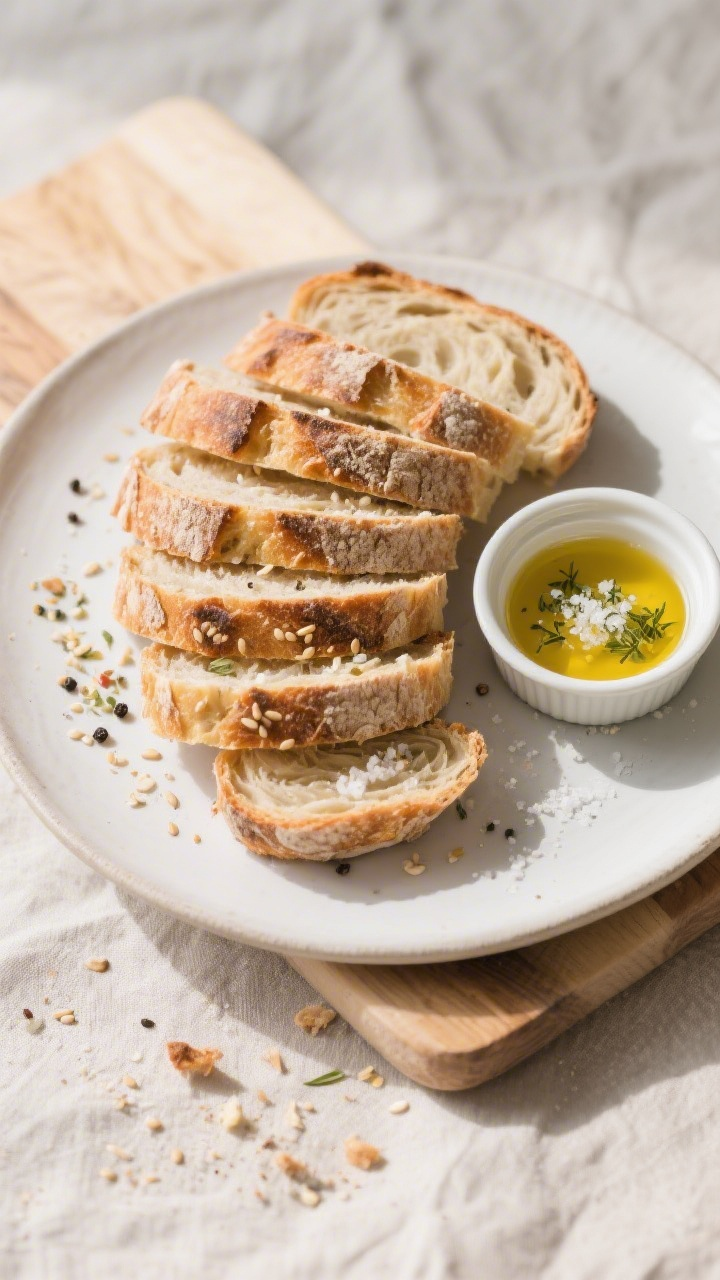
- Serve: Slice with a serrated knife.
Enjoy warm with butter, olive oil and salt, or alongside soup and salads.
Storage Instructions
- Room temperature: Wrap loosely in a clean towel or store cut-side down on a board for up to 2 days. Avoid sealing while warm—it softens the crust.
- Longer storage: Once fully cool, place in a paper bag inside a loose plastic bag to balance moisture and crust. Keeps 3–4 days.
- Freezing: Freeze whole or sliced, tightly wrapped, for up to 2 months.
Reheat slices in a toaster or re-crisp a whole loaf at 350°F for 10–12 minutes.
Health Benefits
- Simple ingredients: Flour, water, yeast, and salt keep additives low and ingredients transparent.
- Portion control: A rustic loaf slices well into thin pieces, making it easy to manage servings.
- Customizable flour: Swap up to half the flour for whole wheat for more fiber and minerals.
- Healthy fats option: Olive oil adds a touch of monounsaturated fat for flavor and tenderness.
Pitfalls to Watch Out For
- Water too hot: If your water is hotter than 120°F, it can kill the yeast. Aim for warm, not hot.
- Overproofing: In a warm kitchen, the quick rise can go fast. If the dough gets very loose and bubbly, move on to shaping sooner.
- Skipping the broil: Pressure cooking alone won’t brown the crust.
The broil step makes the loaf look and taste like bakery bread.
- Too much flour: The dough should be sticky. Adding lots of extra flour makes the loaf dense.
- Broiler burning: Broilers vary. Watch closely and rotate the pan to prevent scorching.
Alternatives
- Flour swap: Use bread flour for chewier texture, or replace 1 cup with whole wheat for nuttiness.
Add 1–2 teaspoons extra water if using whole wheat.
- Flavor boosts: Stir in 1 teaspoon sugar or honey for a hint of sweetness, 1 teaspoon dried herbs, or 1/3 cup shredded cheese.
- Topping ideas: Brush with olive oil and sprinkle coarse salt, sesame seeds, or everything seasoning before broiling.
- Shape variations: Make two mini rounds by dividing the dough; reduce pressure cook time to 15 minutes and broil both.
- Gluten-free approach: Use a quality 1:1 gluten-free flour blend with xanthan gum. The dough will be more batter-like; spoon it into the dish and proceed. Expect a tighter crumb.
FAQ
Can I use active dry yeast instead of instant?
Yes.
Bloom 2 1/4 teaspoons active dry yeast in the warm water with a pinch of sugar for 5–10 minutes until foamy, then mix with the dry ingredients. Timing stays the same.
Do I need a special pan for the pressure cooker?
No. Any small, oven-safe, heatproof dish or pan that fits on the trivet works—metal cake pans, ceramic soufflé dishes, or a mini springform pan.
Grease it well.
Why is my loaf pale after pressure cooking?
That’s normal. Pressure cookers create steam but no browning. The broiler step adds the golden crust and toasty flavor.
Can I skip the rise to save time?
It’s not recommended.
Even a short 20-minute rise improves flavor and texture. Without it, the loaf can be tight and bland.
How do I know it’s done inside?
After broiling, the loaf should feel light for its size and sound hollow when tapped on the bottom. If you have a thermometer, aim for an internal temp of about 200–205°F.
What if I don’t have a broiler?
Use a very hot oven (475–500°F) for 8–12 minutes to brown the top.
A preheated cast-iron skillet helps crisp the crust.
Can I double the recipe?
Not for a single loaf in the pressure cooker. Make two separate loaves so the dough cooks evenly and the center sets properly.
How do I add steam for extra crust?
For the broil/bake finish, preheat a sheet pan and lightly mist the loaf with water before it goes in. The added moisture helps blister the crust.
In Conclusion
This no‑knead pressure cooker rustic loaf trims the long wait from traditional bread baking without sacrificing texture or flavor.
You get a tender, steamy crumb from pressure, then a crisp, golden finish under the broiler. With a handful of pantry ingredients and under an hour, fresh bread becomes an everyday treat. Keep this method in your back pocket for cozy dinners, impromptu gatherings, or whenever a warm slice of homemade bread sounds just right.
Printable Recipe Card
Want just the essential recipe details without scrolling through the article? Get our printable recipe card with just the ingredients and instructions.